Good footwork separates average pickleball players from great ones. You can have perfect paddle technique, but without proper footwork, you’ll never reach your full potential on the court.
10 Essential Pickleball Footwork Techniques to Master Your Game covers the essential pickleball footwork techniques that will improve your game immediately. Whether you’re a beginner learning the basics or a pro refining your skills, these techniques will help you move faster, hit better shots, and avoid common pickleball mistakes.
Why Pickleball Footwork Matters
Footwork determines everything in pickleball. It affects your positioning, balance, shot quality, and reaction time.
The numbers show the difference:
Players with proper footwork make 40% fewer unforced errors Good footwork adds 2 to 3 seconds of reaction time per rally Proper positioning increases your winning shot percentage by 25% to 30% Better footwork reduces injury risk by up to 60%
Poor footwork is one of the most common pickleball mistakes to avoid. It leads to late arrivals at the ball, off-balance shots, and missed opportunities.
Let’s break down the 10 essential footwork techniques you need to master.
1. The Split Step: Your Foundation for Quick Reactions
The split step is the most important pickleball footwork technique. It prepares you to move in any direction instantly.
What the Split Step Is
A small hop where both feet leave the ground simultaneously. You land on the balls of your feet with knees slightly bent, ready to explode in any direction.
When to Use It
Execute a split step every time your opponent hits the ball. This timing is critical. The split step must happen as your opponent makes contact.
How to Execute the Split Step Correctly
Step 1: Watch your opponent prepare to hit
Stay on your toes with knees slightly bent. Weight forward on the balls of your feet.
Step 2: As they make contact with the ball, perform a small hop
Jump 1 to 2 inches off the ground. Both feet leave simultaneously.
Step 3: Land on the balls of your feet
Feet shoulder-width apart. Knees bent at approximately 30 degrees. Weight evenly distributed.
Step 4: React to the ball direction
Push off explosively toward the ball. Your prepared position allows instant movement.
Common Mistakes to Avoid
Landing flat-footed: this adds 0.3 to 0.5 seconds to your reaction time. Always land on the balls of your feet.
Timing the hop wrong: hopping before or after contact reduces effectiveness. The hop must happen exactly as the ball is struck.
Hopping too high: keep it small. A 1 to 2-inch hop is sufficient. Higher hops waste energy and time.
Practice Drill
Partner rally drill:
- Have a partner hit balls randomly across the court
- Focus only on split step timing for 5 minutes
- Don’t worry about returning shots perfectly
- Goal: split step occurs as the ball is struck every single time
Repeat daily for one week. Proper split step timing becomes automatic.
2. The Ready Position: Stay Prepared Between Shots
The ready position is your default stance between shots. Poor ready position is one of the most common pickleball mistakes to avoid.
Correct Ready Position Setup
Feet: shoulder-width apart, pointing straight ahead or slightly outward
Knees: bent at 25 to 35 degrees, never locked straight
Weight: forward on the balls of your feet, heels lightly touching ground
Paddle: held at chest height, paddle face pointing toward opponent
Arms: elbows slightly bent, paddle held with both hands when possible
Back: straight but relaxed, slight forward lean from the hips
Why This Position Works
This stance allows you to move in any direction within 0.2 to 0.3 seconds. Standing straight or leaning back adds 0.5 to 1 second to your movement time.
The ready position also reduces fatigue. Proper weight distribution lets you stay light on your feet for longer periods.
Common Mistakes to Avoid
Standing too upright: this is the number one ready position error. Keep your knees bent throughout the point.
Weight on heels: shifts your center of gravity backward. Makes forward movement slow and awkward.
Paddle held too low: forces you to lift the paddle before every shot. Hold it at chest height for faster reactions.
Feet too close together: reduces stability and movement speed. Maintain shoulder-width spacing.
Position Check
Do this check between every point:
- Are my knees bent?
- Is my weight forward?
- Is my paddle up?
- Are my feet shoulder-width apart?
If you answer no to any question, adjust immediately.
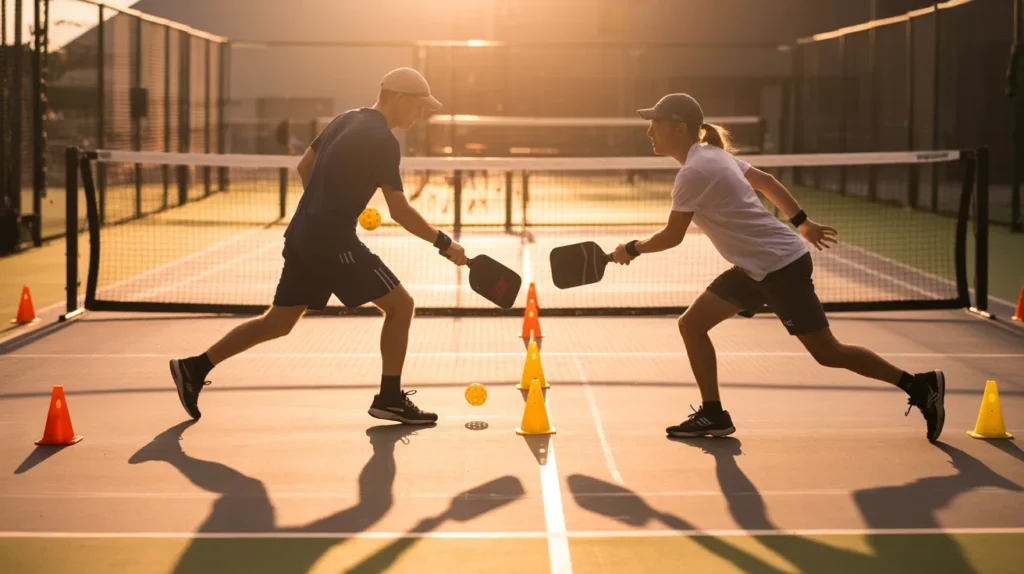
3. Side-to-Side Shuffle: Cover the Court Width Efficiently
The side shuffle is essential for covering lateral distance without turning your body away from the net.
When to Use Side Shuffle
Any time you need to move 3 to 8 feet laterally across the court. This includes:
- Covering your side during doubles play
- Reaching wide shots
- Adjusting position at the kitchen line
- Moving to cover your partner’s open areas
Proper Side Shuffle Technique
Step 1: Start in ready position
Knees bent, weight forward, paddle up.
Step 2: Push off with the outside foot
Moving right: push hard off your left foot Moving left: push hard off your right foot
Step 3: Step with the lead foot
Take a wide step (18 to 24 inches) with the foot closest to your destination.
Step 4: Bring the trailing foot to shoulder-width
Don’t cross your feet. Slide the back foot toward the lead foot. Stop when feet are shoulder-width apart.
Step 5: Repeat until you reach the ball
Continue the shuffle pattern. Keep your shoulders square to the net throughout.
Speed and Distance
For distances under 3 feet: take one large step For 3 to 6 feet: use two shuffles For 6 to 10 feet: use three to four shuffles or consider crossover steps
Common Mistakes to Avoid
Crossing your feet: this is one of the most common pickleball mistakes to avoid with lateral movement. Crossed feet create imbalance and slow your recovery.
Bringing feet too close together: maintain shoulder-width spacing. Narrow stance reduces stability.
Rising up during the shuffle: stay low. Keep your knees bent throughout the movement.
Turning your shoulders: keep them square to the net. Turning reduces your ability to hit both forehand and backhand shots.
Practice Drill
Cone shuffle drill:
- Place cones 6 feet apart along the kitchen line
- Shuffle side to side touching each cone
- Complete 10 round trips
- Focus on: keeping knees bent, feet shoulder-width apart, shoulders square
Perform this drill three times per week.
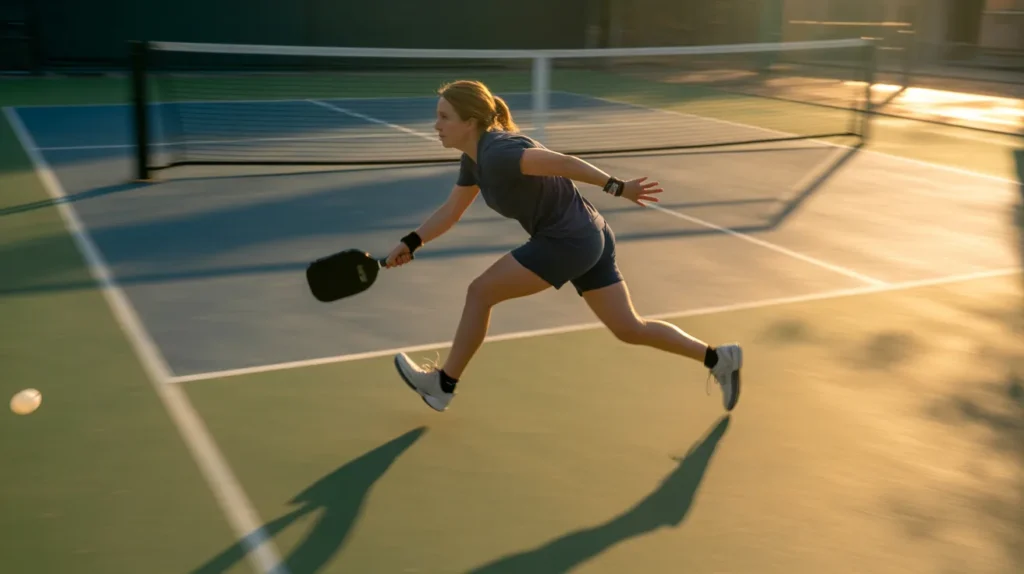
4. Crossover Step: Cover Long Distances Quickly
The crossover step moves you faster than shuffling for distances over 8 feet.
When to Use Crossover Steps
Wide balls that pull you far from center. Emergency reaches. Transitioning from baseline to kitchen. Any time you need maximum speed over longer distances.
Proper Crossover Technique
Step 1: Recognize you need to cover significant distance
If the ball is more than 8 feet away, use crossover steps instead of shuffling.
Step 2: Turn your hips and shoulders
Pivot toward your destination. This rotation generates power for the movement.
Step 3: Cross your back foot over your front foot
Moving right: left foot crosses in front of right foot Moving left: right foot crosses in front of left foot
Step 4: Take wide steps
Each crossover step should cover 3 to 4 feet. Push hard off each foot.
Step 5: Finish in ready position
As you reach the ball, plant your outside foot and open your hips back to the net. This sets up your shot.
Speed Comparison
Side shuffle: covers 6 feet in approximately 0.8 to 1 second Crossover steps: covers 6 feet in approximately 0.5 to 0.6 seconds
For distances over 8 feet, crossover steps save 0.3 to 0.5 seconds.
Common Mistakes to Avoid
Using crossover steps for short distances: shuffling is better for movements under 8 feet. Crossover steps for short distances wastes energy.
Not opening hips to the net when you arrive: this forces awkward body positioning for your shot. Always finish with hips open.
Taking small steps: crossover steps should be large and explosive. Small steps defeat the purpose.
Practice Drill
Wide ball drill:
- Start at center of baseline
- Partner hits balls 10 to 12 feet to your right or left
- Use crossover steps to reach the ball
- Return the ball and recover to center
- Repeat 20 times
Focus on explosive first step and opening hips when you arrive at the ball.
5. Forward Movement: Approach the Kitchen Line Correctly
Moving forward to the kitchen line is crucial in pickleball. Poor forward movement technique is one of the most common pickleball mistakes to avoid.
When to Move Forward
After serving or returning serve. After hitting a deep shot that pushes opponents back. Any time you can safely advance to the kitchen line without getting caught in transition.
Proper Forward Movement Technique
Step 1: Hit your shot
Make solid contact with the ball before beginning your forward movement.
Step 2: Take quick, small steps
Steps should be 12 to 18 inches long. Quick steps let you stop and change direction if needed.
Step 3: Stay low
Keep your knees bent. Maintain ready position as you move forward.
Step 4: Keep paddle up
Hold your paddle at chest height. Be ready for a volley or drive during your advance.
Step 5: Stop 6 to 12 inches behind the kitchen line
Plant your feet in ready position. Prepare for the next shot.
The Two-Step Rule
Most players need two to four steps to move from baseline to kitchen line. Plan your movement to arrive in an even number of steps. This lets you finish in a balanced, ready position.
Common Mistakes to Avoid
Taking large steps: large steps commit your weight too much. You can’t react to drop shots or passing shots. Take small, controlled steps.
Running with head down: keep your eyes on the ball and your opponents. Watch for drop shots as you advance.
Stopping on the kitchen line: your momentum will carry you into the kitchen on your next shot. Stop 6 to 12 inches behind the line.
Arriving too early: moving forward before your shot lands deep gives opponents easy passing shots. Hit first, then advance.
Practice Drill
Serve and advance drill:
- Serve deep to the baseline
- Take three quick steps forward
- Stop in ready position
- Repeat 20 times
- Focus on small steps, staying low, paddle up
Vary your serve placement but always follow with controlled forward movement.
6. Backward Movement: Defend Lobs and Deep Shots
Moving backward efficiently is critical for defending lobs. This pickleball footwork technique prevents easy overhead winners.
When to Move Backward
When opponents hit lobs over your head. When deep drives push you away from the kitchen line. When you need to reset positioning during a rally.
Proper Backward Movement Technique
Step 1: Recognize the lob early
Watch your opponent’s paddle angle. Upward angle indicates a lob. Start moving as soon as you recognize it.
Step 2: Turn and run
Don’t backpedal. Turn your body and run toward where the ball will land. Running backward is slower and more dangerous.
Step 3: Track the ball over your shoulder
Keep your eyes on the ball. Turn your head to track it as you run.
Step 4: Plant and set up for your shot
Stop moving before you hit. Plant your feet in a balanced position. Hit your overhead or groundstroke from a stable base.
Speed Comparison
Backpedaling: covers 10 feet in approximately 2 to 2.5 seconds Turning and running: covers 10 feet in approximately 1 to 1.2 seconds
Turning and running saves 1 to 1.3 seconds. This often makes the difference between reaching the lob and watching it bounce.
Common Mistakes to Avoid
Backpedaling instead of turning and running: this is the most common mistake with backward movement. Backpedaling is slow and increases fall risk.
Taking your eyes off the ball: maintain visual contact throughout your backward movement.
Hitting while still moving: stop before you hit. Moving backward during your shot causes errors.
Giving up on deep lobs: many lobs that look unreachable are actually within range if you turn and run immediately.
Practice Drill
Lob defense drill:
- Partner stands at kitchen line
- You start at kitchen line opposite side
- Partner hits lobs over your head
- Turn and run to retrieve each lob
- Return the ball with overhead or groundstroke
- Repeat 15 times
Focus on immediate recognition and explosive backward movement.
7. Recovery Steps: Return to Position After Each Shot
Recovery steps bring you back to optimal court position after hitting. Poor recovery is one of the most common pickleball mistakes to avoid.
Why Recovery Matters
Every shot you hit pulls you slightly off balance or out of position. Recovery steps reset your positioning so you’re ready for the next ball.
Players who recover quickly after each shot:
- Cover more court area
- Make fewer errors on the next ball
- Create better angles for their shots
- Tire less quickly during long rallies
Proper Recovery Technique
Step 1: Complete your shot and follow-through
Finish your hitting motion before beginning recovery.
Step 2: Push off your back foot
Use your back foot to generate momentum back toward center.
Step 3: Take 1 to 3 quick recovery steps
Small, quick steps back to optimal position. Usually 1 to 3 steps is sufficient.
Step 4: Execute split step as opponent hits
Your recovery should finish just as your opponent makes contact. Time your recovery to arrive in ready position for the split step.
Optimal Court Positions
At the kitchen line: position yourself to cover your half of the court. In doubles, stay roughly 5 to 6 feet from the sideline.
In transition (between baseline and kitchen): get to the kitchen line as quickly as possible. Don’t linger in no-man’s land.
At baseline: position yourself near the center of your coverage area. Adjust based on your opponent’s position and shot tendencies.
Common Mistakes to Avoid
Admiring your shot: watching your great shot instead of recovering leaves you vulnerable. Hit, recover immediately, then watch.
Recovering too far: taking unnecessary steps wastes energy. Recover to optimal position, no farther.
Standing flat-footed after recovery: finish recovery in ready position with knees bent, ready for split step.
Practice Drill
Recovery pattern drill:
- Partner feeds balls alternating wide to your forehand and backhand
- Hit each ball
- Recover to center between each shot
- Focus on: quick recovery, arriving in ready position, immediate split step
Complete 3 sets of 20 balls.
8. Kitchen Line Footwork: Maintain Balance at the Non-Volley Zone
The kitchen line requires special footwork considerations. This is where most rallies are won or lost.
Proper Kitchen Line Stance
Feet: shoulder-width apart, 6 to 12 inches behind the kitchen line
Weight: slightly forward on balls of feet
Knees: bent at approximately 30 to 40 degrees (lower than baseline stance)
Paddle: held at chest to shoulder height
Position: squared to the net, ready to move left or right
Key Kitchen Line Footwork Techniques
Staying outside the kitchen: keep your weight balanced so you don’t fall forward into the kitchen after volleys.
Small adjustment steps: use tiny 3 to 6-inch steps to position yourself perfectly for each ball.
Keeping feet moving: never plant your feet and stand still. Make small weight shifts and adjustments constantly.
The Kitchen Line Volley Stance
For balls hit directly at you:
- Keep feet parallel to the kitchen line
- Knees bent deeply
- Weight centered
- Quick hand speed rather than large movements
For balls to your side:
- Quick shuffle step to position
- Keep feet outside the kitchen
- Recover to center immediately after the shot
Common Mistakes to Avoid
Standing on the kitchen line: your momentum carries you in on contact. Stand 6 to 12 inches back.
Taking large steps at the line: this often results in kitchen faults. Use small adjustment steps.
Standing too upright: bend your knees more at the kitchen line than at the baseline. Lower stance improves balance and reaction time.
Crossing into the kitchen after volleys: your momentum carries you forward on hard volleys. Practice controlled volleys that keep you outside the kitchen.
Practice Drill
Kitchen line dinking drill:
- Stand 8 inches behind kitchen line
- Partner dinks balls left and right
- Use small steps to position for each dink
- Focus on: staying outside kitchen, small adjustments, low ready position
- Dink for 5 minutes straight
This drill builds kitchen line footwork habits and stamina.
9. Pivot Footwork: Generate Power and Reach on Groundstrokes
Pivoting correctly adds power to your shots and extends your reach. Poor pivot technique limits shot quality.
The Groundstroke Pivot
When hitting groundstrokes from the baseline or mid-court, proper pivot footwork is essential.
Forehand Pivot Technique
Step 1: Recognize ball coming to your forehand side
Begin your preparation early.
Step 2: Pivot on your left foot (for right-handed players)
Your left foot becomes your pivot point. It stays planted.
Step 3: Step toward the ball with your right foot
Take a 12 to 18-inch step toward the ball. This step should be slightly forward and to the side.
Step 4: Rotate your hips and shoulders
Generate power through hip rotation. Your hips should face the side fence at contact, then rotate through to face the net on follow-through.
Step 5: Transfer weight from back foot to front foot
Weight shifts forward through the shot. This adds power and control.
Backhand Pivot Technique
Step 1: Recognize ball coming to your backhand side
Turn your shoulders early.
Step 2: Pivot on your right foot (for right-handed players)
Your right foot becomes the pivot point.
Step 3: Step toward the ball with your left foot
Step 12 to 18 inches toward the ball and slightly forward.
Step 4: Rotate hips and shoulders through contact
Hip rotation generates power on the backhand side.
Common Mistakes to Avoid
No weight transfer: hitting with weight on back foot reduces power by 30% to 40%. Always transfer weight forward through your shot.
Stepping in the wrong direction: your step should be toward the ball, not parallel to the baseline. Proper step direction adds 10% to 15% more power.
Not pivoting the back foot: keep your back foot planted as a pivot point. Moving it reduces stability and power.
Practice Drill
Groundstroke pivot drill:
- Partner feeds balls from across net
- Alternate forehand and backhand groundstrokes
- Focus entirely on footwork and weight transfer
- Ignore shot placement for this drill
- Complete 3 sets of 30 balls
Video yourself to check proper pivot and weight transfer technique.
10. Stacking Footwork: Coordinate Movement in Doubles
Stacking is an advanced doubles strategy. It requires specific pickleball footwork techniques to execute properly.
What Stacking Is
Both players line up on the same side of the court before the serve. After the serve, they quickly move to their preferred court positions.
Why Players Stack
To keep stronger forehands in the middle. To exploit court positioning advantages. To protect weaker backhands.
Stacking Footwork for the Server
Step 1: Line up close to your partner before serving
Both players start on the same side of the court.
Step 2: Serve from your position
The server serves from their current position (not their traditional side).
Step 3: Immediately switch after serving
As soon as you serve, take 2 to 3 quick steps to your desired court position.
Step 4: Arrive at the kitchen line in your target position
Complete your switch before your opponents return the serve.
Stacking Footwork for the Server’s Partner
Step 1: Start at the kitchen line on same side as server
Position yourself close to the center line.
Step 2: As soon as server makes contact, move
Take 3 to 4 quick crossover steps to your target side.
Step 3: Arrive in ready position before the return
Be set and ready with paddle up when the ball comes back.
Common Mistakes to Avoid
Moving too slowly: hesitation defeats the purpose of stacking. Move immediately and decisively.
Not communicating: partners must agree on positioning before the point. Confusion leads to gaps in coverage.
Stacking on every point: only stack when it provides a clear advantage. Random stacking confuses partners.
Practice Drill
Stacking transition drill:
- Practice the switch without the ball
- Server and partner execute the stack movement
- Focus on timing and speed
- Complete 10 repetitions
- Add the ball once the movement pattern is smooth
Stacking requires practice to execute effectively during match play.
Building Your Footwork Practice Routine
Improving your pickleball footwork techniques requires consistent practice. Here’s how to structure your training.
Daily Quick Drills (10 minutes)
Choose 2 to 3 drills from this article. Practice them at the start of every session. Focus on one technique at a time for one week, then move to the next.
Week 1: Split step timing Week 2: Side shuffle technique Week 3: Forward and backward movement Week 4: Recovery steps
Weekly Focused Practice (30 minutes)
Dedicate one practice session per week to footwork only. Ignore shot quality. Focus entirely on movement patterns.
Warm up: 5 minutes of court movement (shuffles, crossovers, forward and back) Drill work: 20 minutes practicing specific techniques Cool down: 5 minutes of light movement
Monthly Assessment
Video yourself playing once per month. Watch specifically for:
- Split step timing and consistency
- Ready position maintenance
- Proper lateral movement (shuffle vs crossover)
- Recovery after each shot
- Balance at contact
Identify your weakest area. Focus extra practice time on that technique next month.
Common Pickleball Mistakes to Avoid with Footwork
Watch for these errors in your game. They prevent you from reaching your full potential.
Standing flat-footed between shots: stay on the balls of your feet, knees bent, ready to move.
No split step: you’ll be 0.5 to 1 second slower reacting to each ball without the split step.
Crossing feet during lateral movement: causes balance problems and slower recovery.
Taking large steps when small steps are better: use small adjustment steps for distances under 3 feet.
Admiring your shots: recover immediately after every shot.
Moving before hitting: finish your shot before beginning your next movement.
Not bending knees enough: low stance improves balance, reaction time, and shot quality.
Every player makes these mistakes sometimes. The goal is to recognize them and correct them through focused practice.
Your pickleball footwork techniques determine your ceiling as a player. Master these 10 techniques through dedicated practice. You’ll see immediate improvements in your court coverage, shot quality, and match results.
10 Essential Pickleball Footwork Techniques to Master Your Game
We have covered, in depth I may add, the 10 Essential Pickleball Footwork Techniques to Master Your Game, and hopefully you have now got your footwork sorted out, or at least have a good starting point.
Once you have practiced everything we have covered it will be time to further improve and what better way than working on your shot placement. Take a look at “Beginner-to-Pro Pickleball Drills to Perfect Your Shot Placement“, to get that little bit further ahead of your opponent!